There are two primary ways to make an Instagram Reel with photos. The first option is to use the built-in reel editor that is accessible through Instagram’s official app, which is available for both Android and iOS devices.
The second method is to use a third-party app or website to create an Instagram reel with multiple photos. There are numerous dedicated reel maker apps and short-form video editing apps for Android and iPhone. You can use one of them to create Instagram reels by combining multiple photos into a short-form video reel. Let’s explore these two methods in detail.
Use Instagram’s Built-in Reel Editor (Android & iPhone:)
If you’re using an Android or iPhone, you can use Instagram’s official app to access the reel editor. It allows you to combine multiple images into a single Instagram reel and apply various transitions between them to make it look more professional.
After adding photos from your gallery to your reel in Instagram’s native reel editor, you can personalize your reels by adding text, music, stickers, and other elements. Here is ow to do it:
Steps to Make a Reel on Instagram With Photos
- Open the Instagram app and log in to your account on your smartphone.
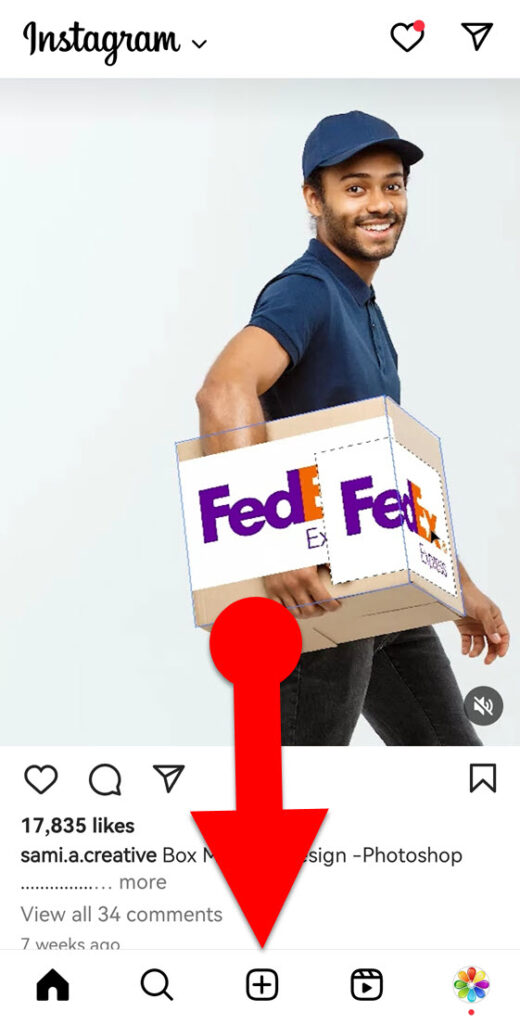
- In the bottom center of the app, tap the “+” (plus) icon.
- Select “Reel” by swiping left at the bottom of the screen.
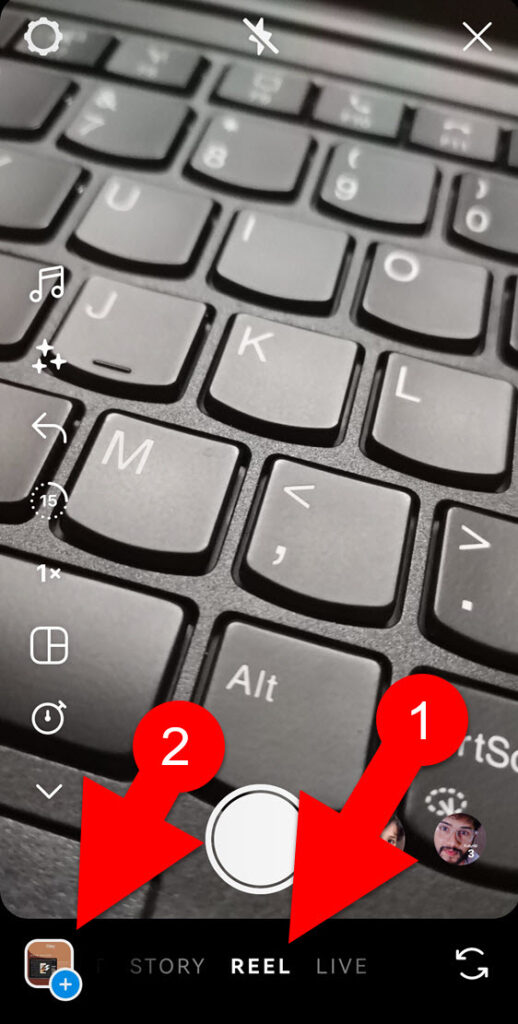
- On the reel creation screen, tap the gallery icon in the bottom-left corner or swipe up from the bottom of the screen to open the media browser, which will list all of your photos and videos from your gallery.
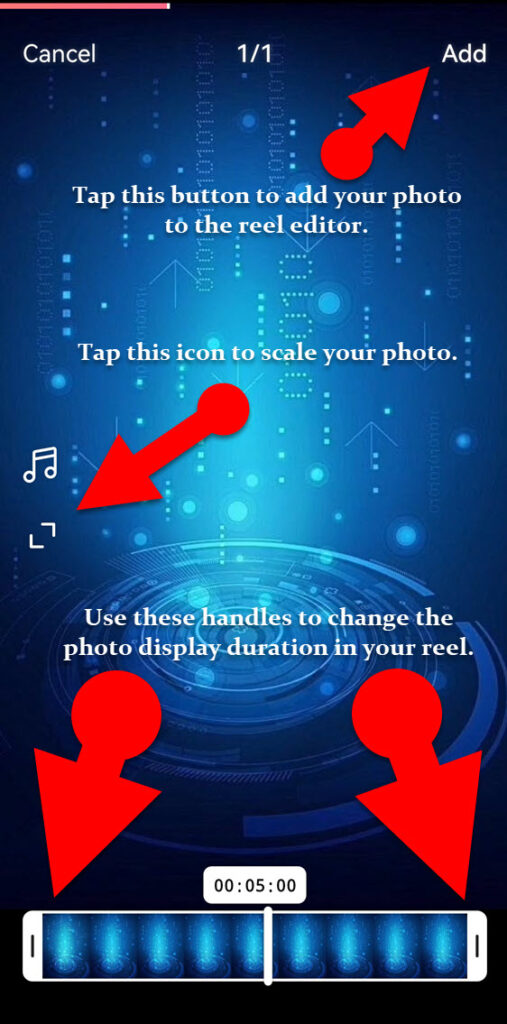
- Depending on your preferences, you can either select a photo in the media browser and then repeat the process to add multiple photos to your Instagram reel, or you can select multiple photos at once in the media browser to add bulk images to your reel simultaneously.
Individual photo selection:
Multiple photo selection:
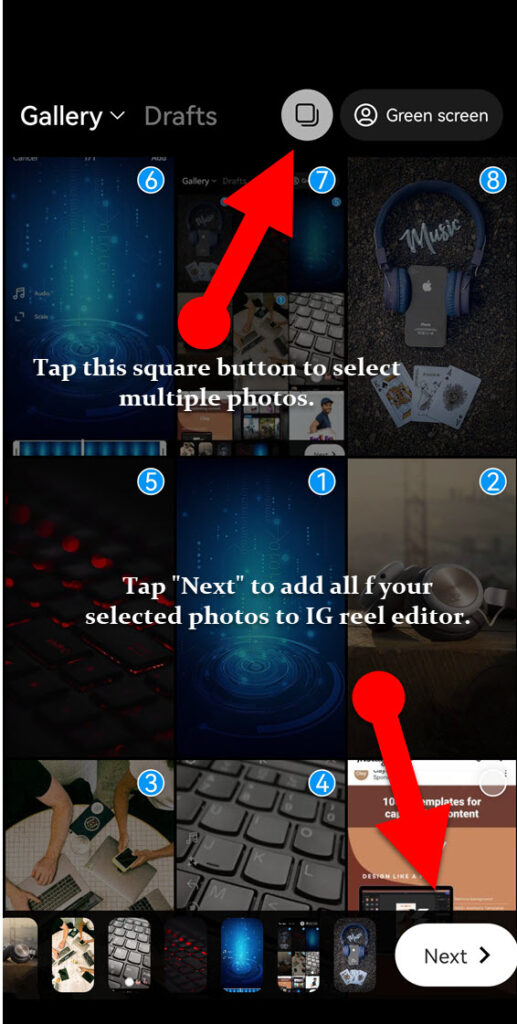
- To choose more than one photo at once, you must turn on the multiple photo selection mode. To do this, tap the two overlapping square button at the top of the media browser or long-press on any photo in the media browser. This will activate multiple file selection mode, and you can then select the photos you want to add to your reel. This way, you can choose up to 50 photos and import them to Instagram reel editor at once.
- After selecting the desired images for your reel, tap the “Next” button in the lower-right corner of the screen. Then, your photos will be put together into one video, and at the bottom, you’ll see suggestions for music to add to your reel.
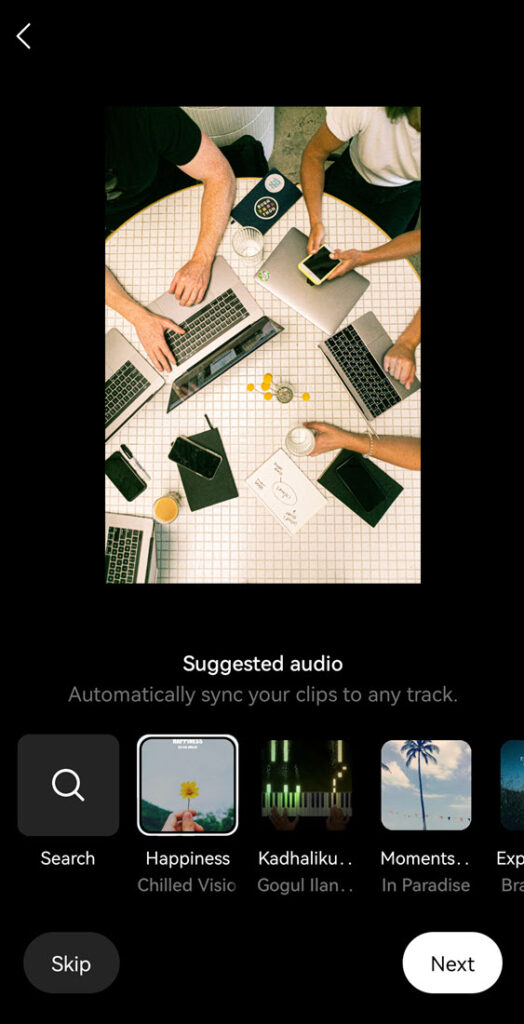
- You can choose to add music to your reel by selecting an audio and tapping the “Next” button at the bottom right. If you don’t want to add music, you can tap the “Skip” button at the bottom left.
- On the next screen, your reel will start playing like a slide show. To enhance the visual appeal of your reel, you can add pop-up text, transition, stickers, creative elements, etc. You can find these reel enchantment tools at the top of the Instagram reel editor. Use these tools to make your IG reel more polished and professional.
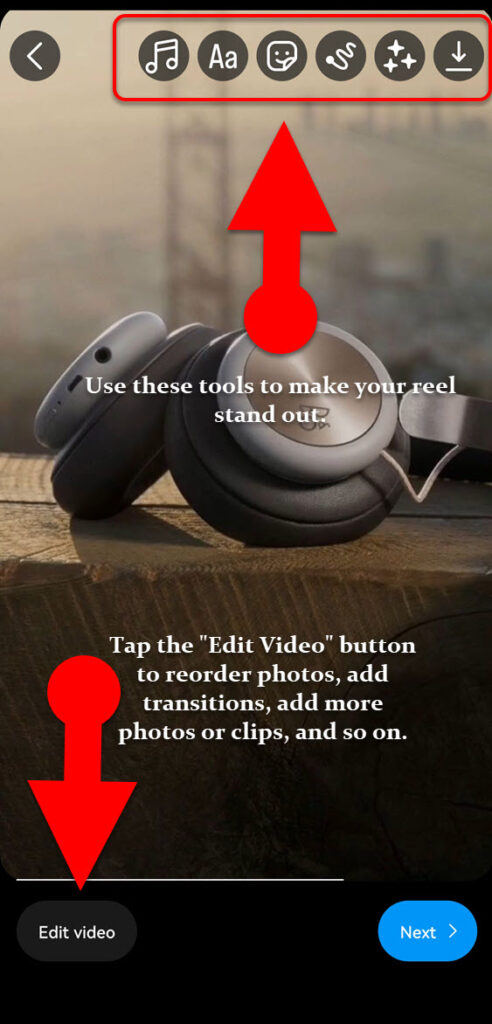
- You can reorder photos, add another photo or video to your clip, add or change music, and add transition effects to your reel by accessing its timeline. To access your reel’s timeline, tap on the “Edit video” button in the lower left corner of the reel preview window.
- You can swipe up on the screen to add polls, quizzes, countdowns, photo stickers, etc. to your photo reel if you want to make it more interesting.
- Once you’ve finished editing your reel, tap the “Next” button in the bottom right corner, add a caption, and then tap the “Share” button at the bottom to share it on Instagram.
RELATED POST
Use Canva (Mobile & PC)
Canva is a graphic design tool that is available for almost every platform, including Android, iPhone, and desktop computers. It includes a variety of photo editing tools, elements, and templates for creating and editing professional-looking graphics, presentations, social media posts, and so on.
You can create impressive Instagram reel videos with the help of Canva by combining a number of still images into a single video, then adding to it a number of different animation effects, stickers, and text.
Since it is accessible on any device, you can make a reel with photos on any device, including Android, iPhone, and PC, with the help of Canva. Let’s see how you can make Instagram reels with photos using Canva.
Steps To Make a Reel with Photos Using Canva
- Download and install Canva on your mobile device. You can tap this link to download it.
- Once the installation is complete, open the app on your mobile device.
- Log in to your existing account or create a new one by selecting “Continue with Google,” “Continue with Facebook,” “Continue with email,” or “Continue another way” from the list of available options in the app.
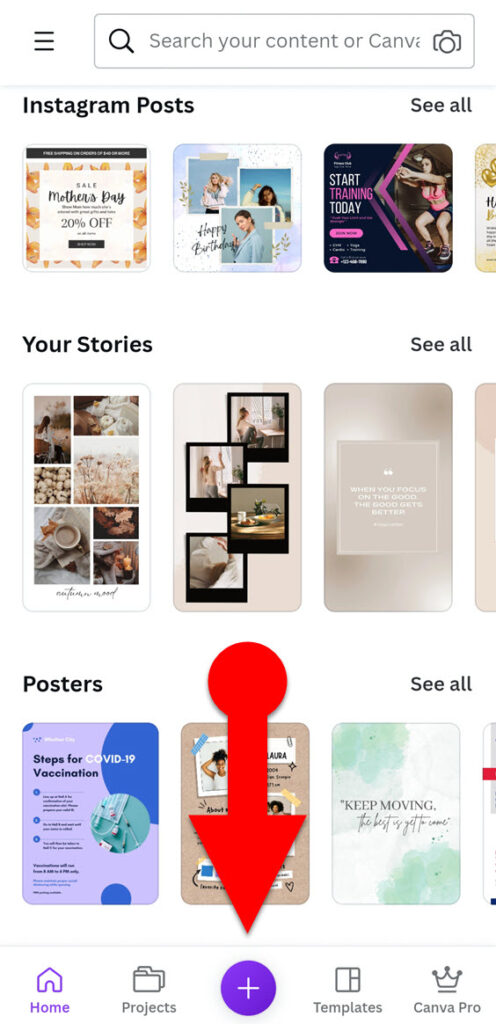
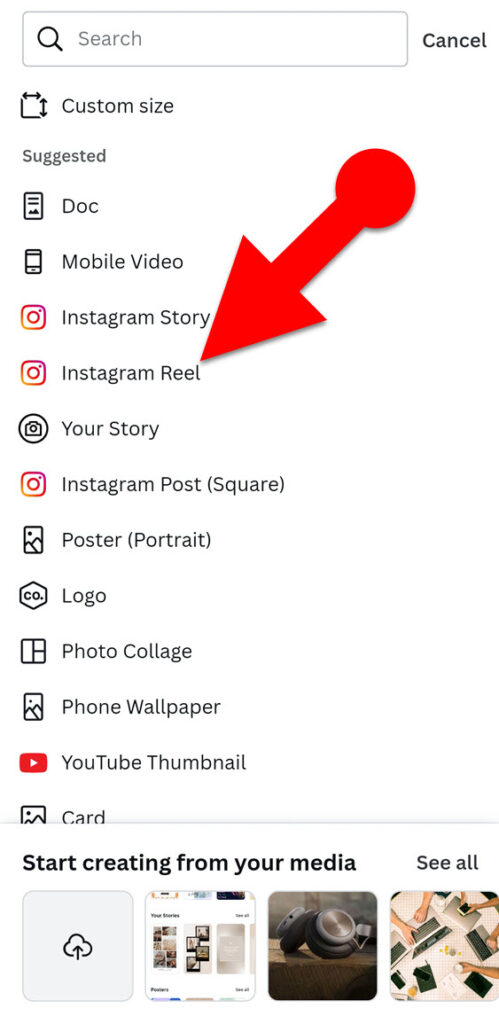
- After logging in, tap the + (plus) icon at the bottom center of the app and select “Instagram Reel” from the list of suggested options to sets up the correct dimensions for your reel. This will create a blank page for creating a reel and open the templates window.
NOTE: Canva will ask for permission to access your photos, videos, and other files on your device if you haven’t already granted Canva access to your media files. In the pop-up window, select “allow” to proceed.
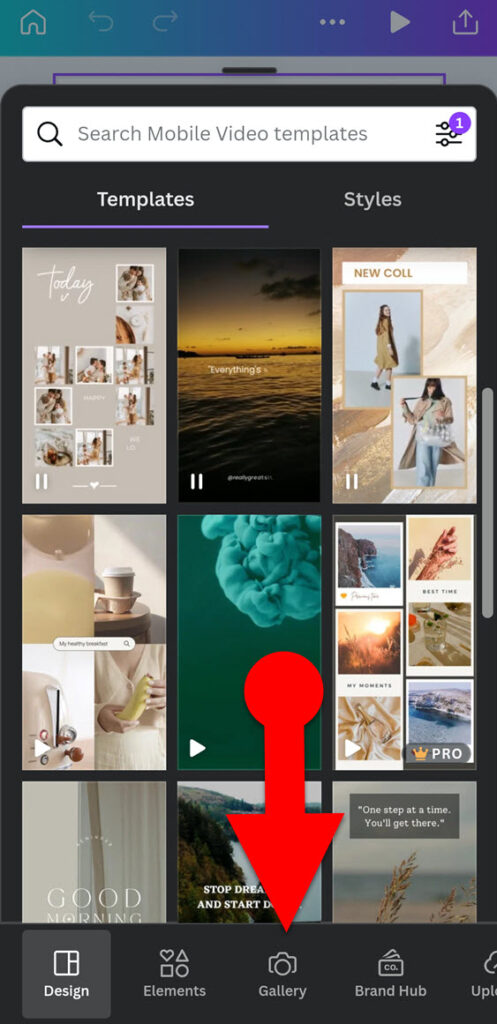
- Tap the “Gallery” icon at the bottom of the screen to browse your device’s photos.
- In the media browser, select photos you prefer to add to your reel by tapping on them.
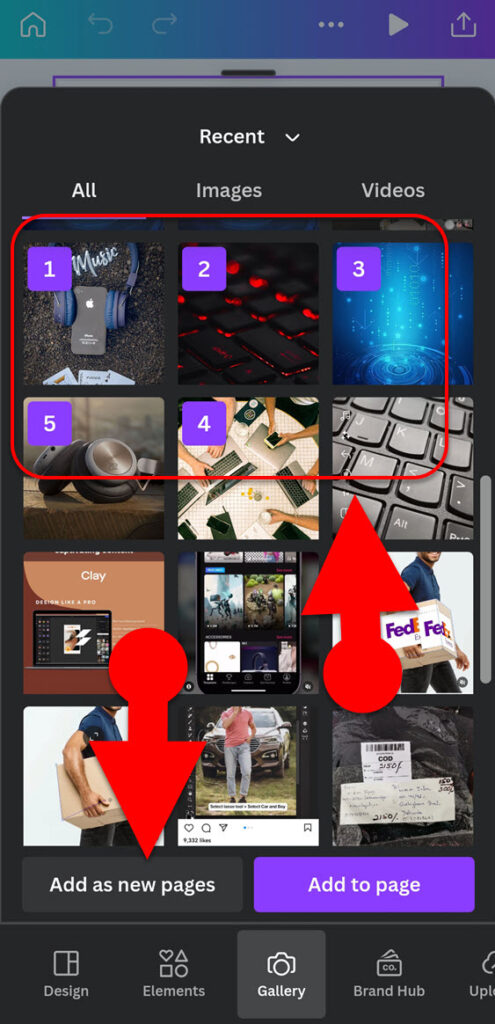
- After you have selected your photos, tap the “Add as new pages” button in the lower left-hand corner of the screen. This will add your photos to the “Story View” section of the Canva video editor. Each photo will be assigned to display for 5 seconds by default.
In the editor, a blank page will be added as the first page, which will play for the first 5 seconds of your reel. If you don’t want it, you can delete it by tapping it and then selecting the trash icon at the bottom.
You can easily edit any image individually because each photo will be added to separate pages with its own thumbnail image.
- After you’ve added all of your images to your reel, you can preview it by tapping the “play button.” At this point, your reel will play as a slideshow. However, you can use Canva’s video editing tools to make your reel more engaging and visually appealing. For example, you can add text, stickers, music, and many other elements to your reel. You can also trim and adjust the length of your reel. Depending on your preferences, use the Canva video editor’s following tools to make your reel stand out:
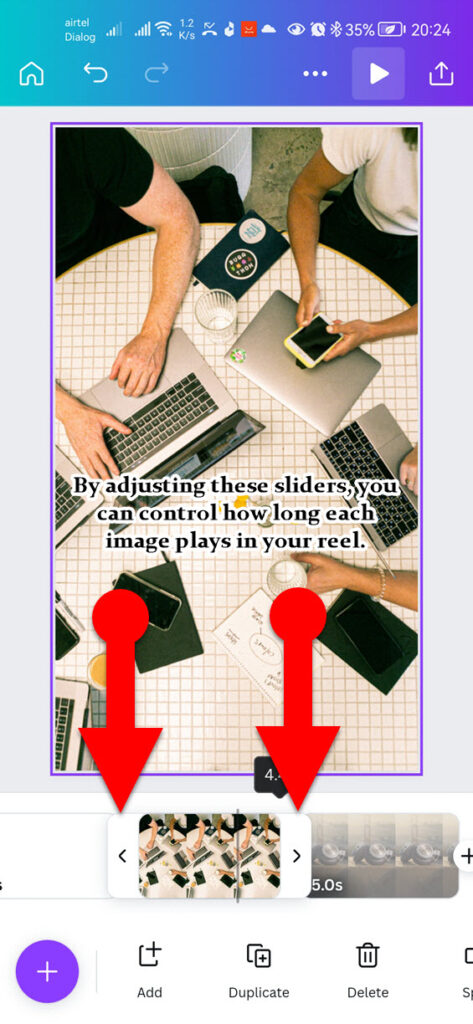
Change the display duration of a single photo: The slider in the editor allows you to change the display duration of any photo in a reel. It is located on the right and left side of each page.
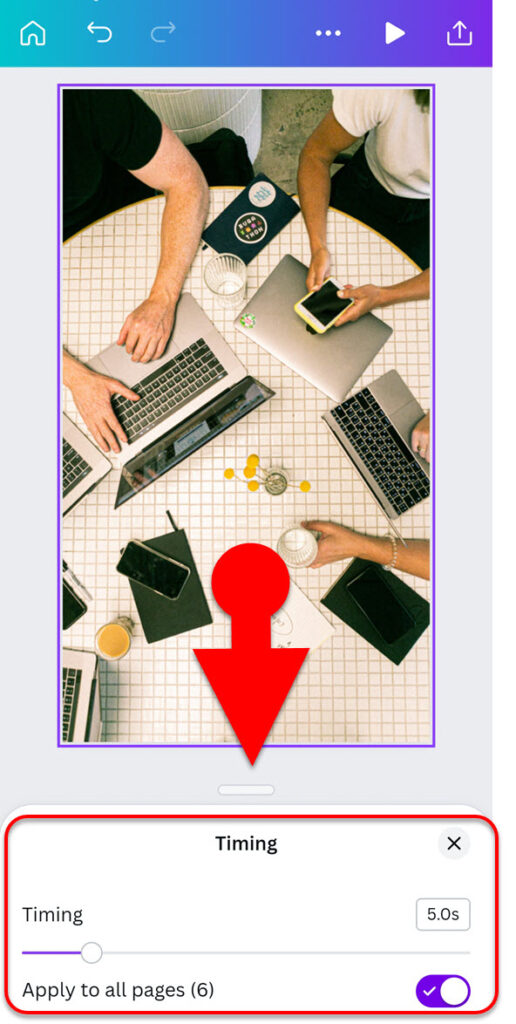
Set the same display duration for all of your photos in your reel: Look for the Clock icon on the toolbar below the editor (you may have to swipe through the toolbar to see it.) After that, adjust the sliding bar to set the desired display duration for all of your photos. Then, at the bottom, toggle the “Apply to all pages (page count)” switch on.
Add transition between two photos or all photos at once: To apply a transition between two images, tap the “+” (plus) icon between two design pages, select the transition option, and then select the desired transition effect. If you want to apply the same transition effect to all photos, select “Apply between all pages” at the bottom after selecting a transition effect.
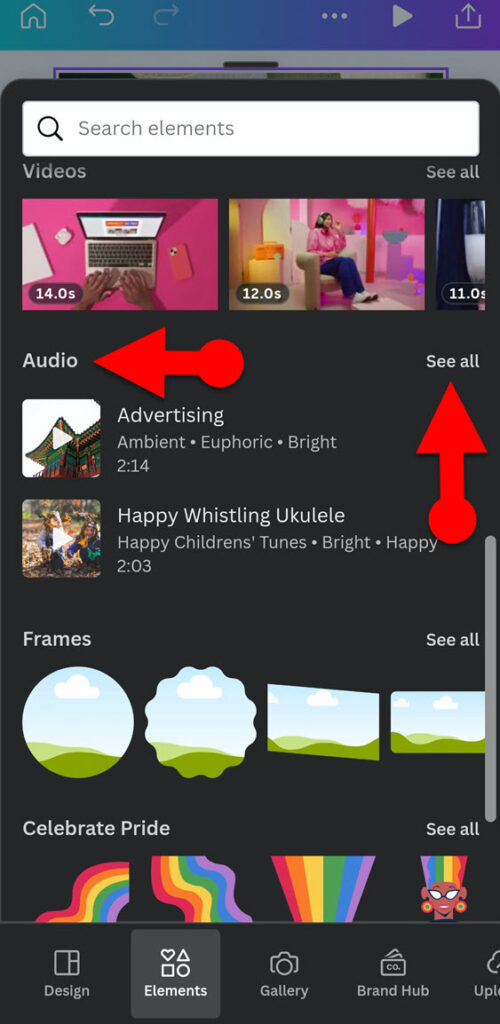
Add audio to your reel: Tap the “+” icon in the editor’s lower-left corner, and then select “Elements” from the menu that appears. Then, scroll down to the “Audio” section and tap on “See all” to explore more. When you find an audio file you want to add to your photo reel, simply tap on it.
Apart from these features, you can add many other creative elements, such as animated stickers, frames, text, doodles to you photo reel.
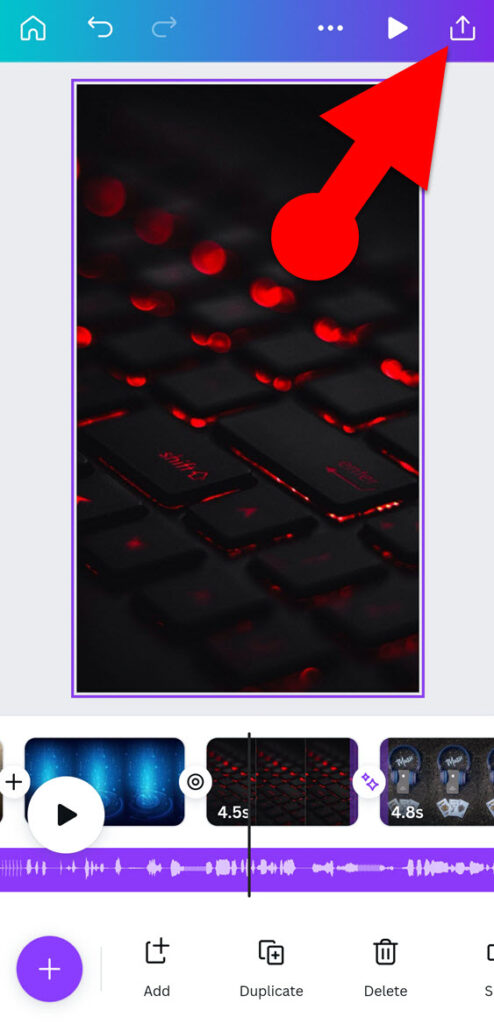
- When you are happy with your photo reel and are ready to export it, tap the “Export” button that is located above the editor. Then, save the photo reel on your device using the appropriate export settings and post it on your Instagram.
Here are some additional tips to make your Instagram photo reel more engaging and look professional
- Always create your reels with high-resolution images. Higher resolution images will have more detail and will look better on Instagram. You can navigate to Pixabay, Unsplash, or Pexels to find a variety of free royalty-free images.
- Make sure your image is 1080 x 1920 pixels in size and has a 9:16 aspect ratio. This ensures that your image is displayed in full screen mode on your reel without being cropped or distorted.
- Provide an appropriate display time for each image in your reel. When an image is displayed for too short a period of time, viewers may not have enough time to fully absorb the information. As a result, they may feel confused or lost. On the other hand, displaying an image for an extended period of time can become boring or repetitive.
- When creating reel with Canva, make sure your reel’s maximum duration is 90 seconds or less. Because, the maximum duration of an Instagram Reel is 90 seconds.
Final Words:
I hope this guide has helped you easily create an Instagram reel with photos. You can quickly create an awesome reel with your own photos using Instagram’s reel editor.
If you prefer to create photo reels with advanced visual effects, animations, and elements, you can use a third-party app like Canva. Canva is an excellent tool for creating Instagram reels from photos and videos.
